How to set up Willo AutoFlo+
Let the brushing begin! Watch our How to set up your Willo AutoFlo+ kids toothbrush to get started.
Step-by-Step Set Up Guide
Review the 7 simple steps to set up your Willo AutoFlo+
Step 1
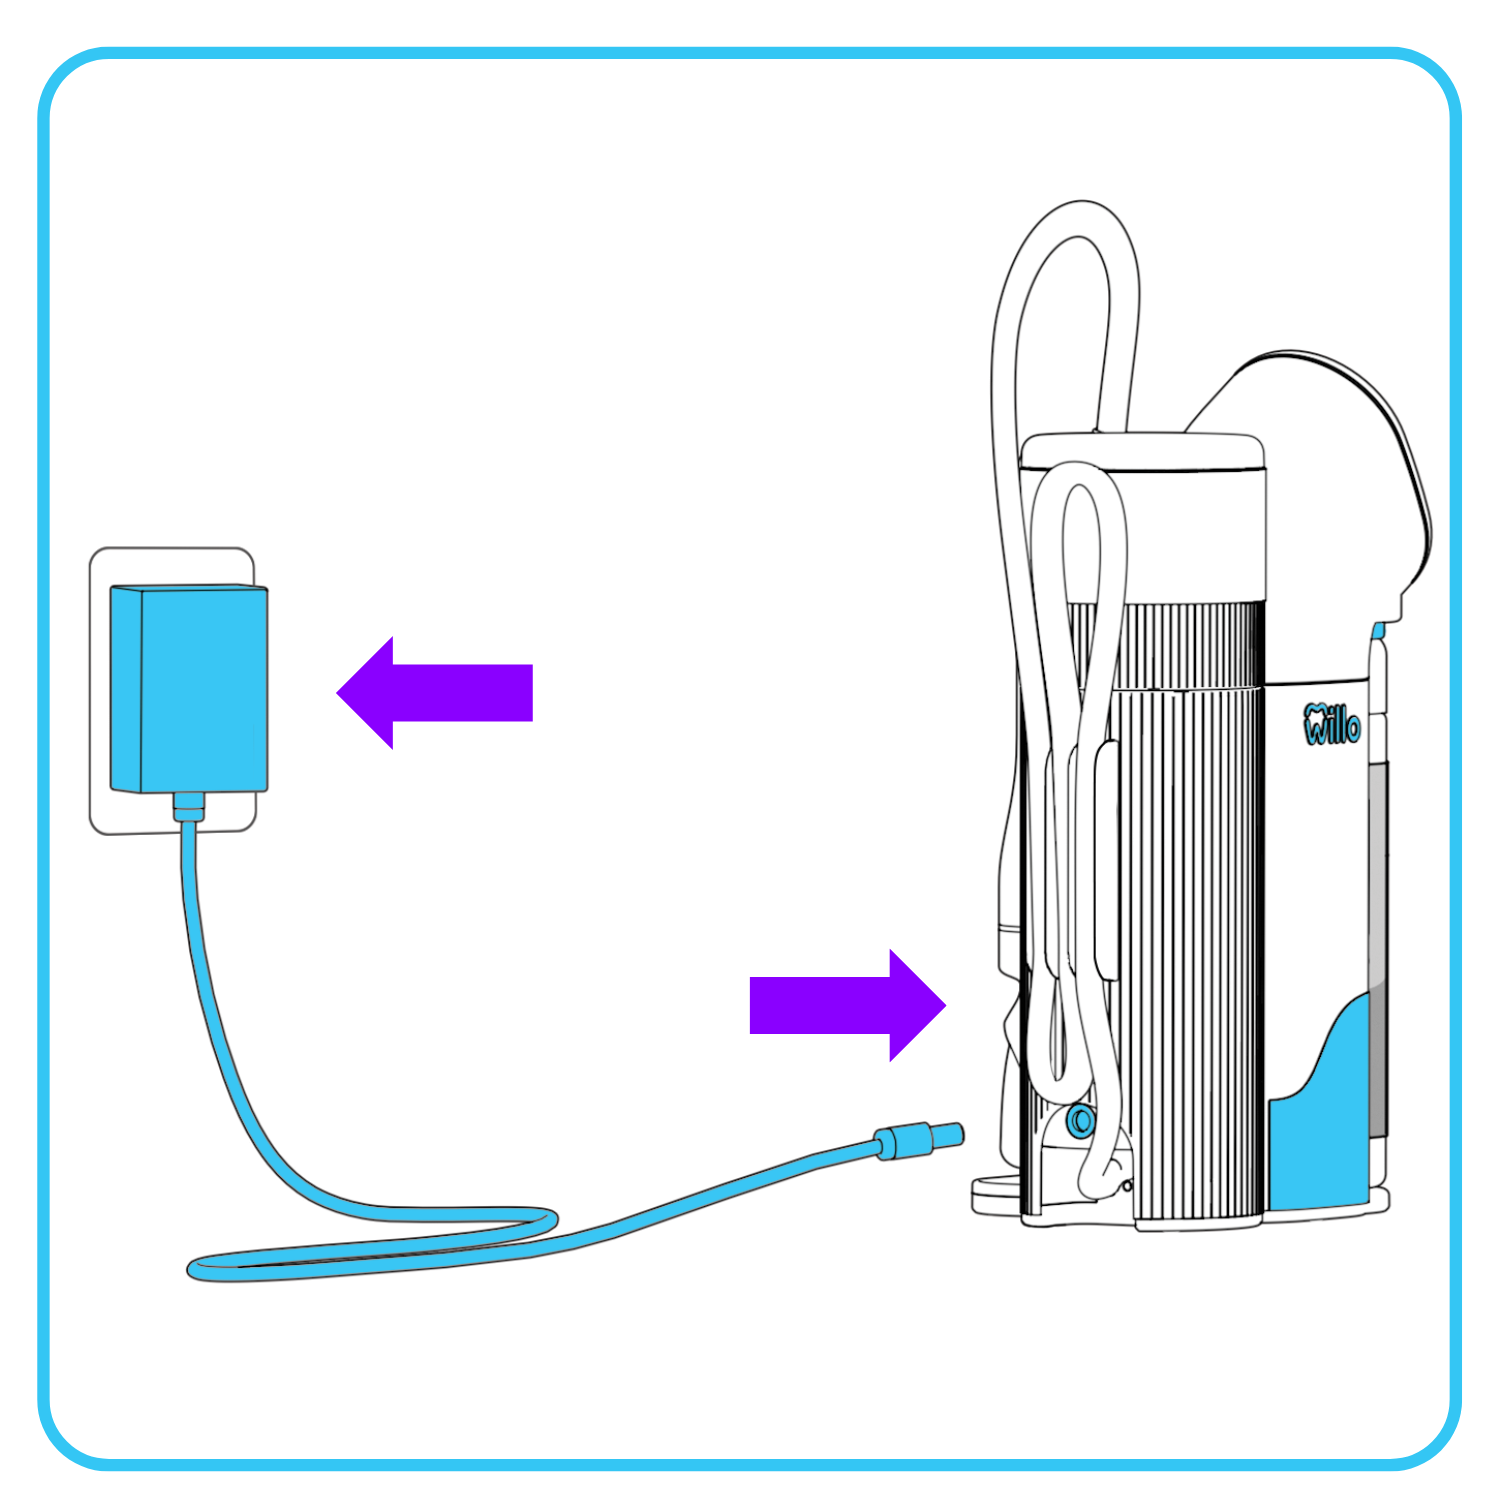
Place your Willo AutoFlo+ on a flat surface near a sink. Plug it into a power outlet. The display will light up.
Step 2
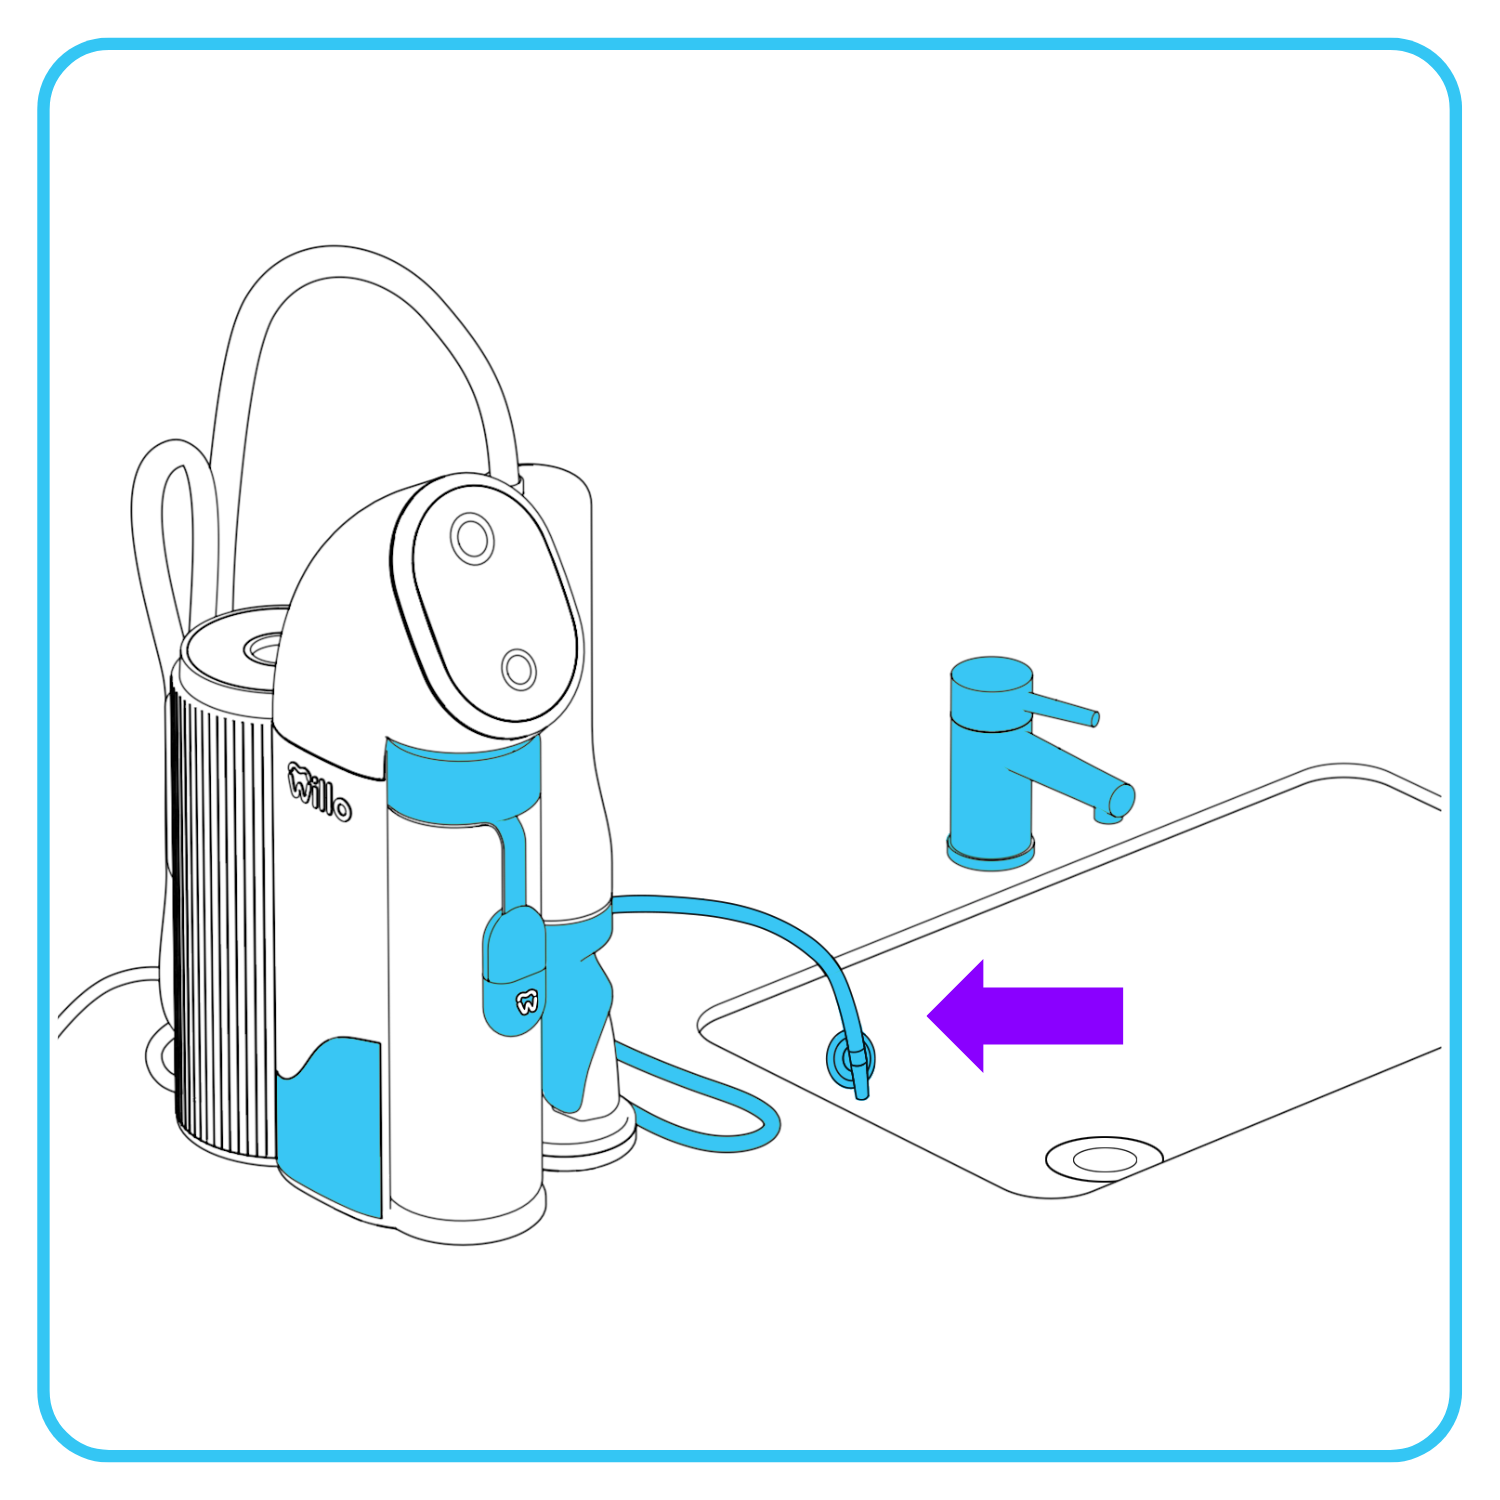
Place the drain hose in the sink using the suction cup.
Liquid will automatically drain into the sink during brushing.
Step 3
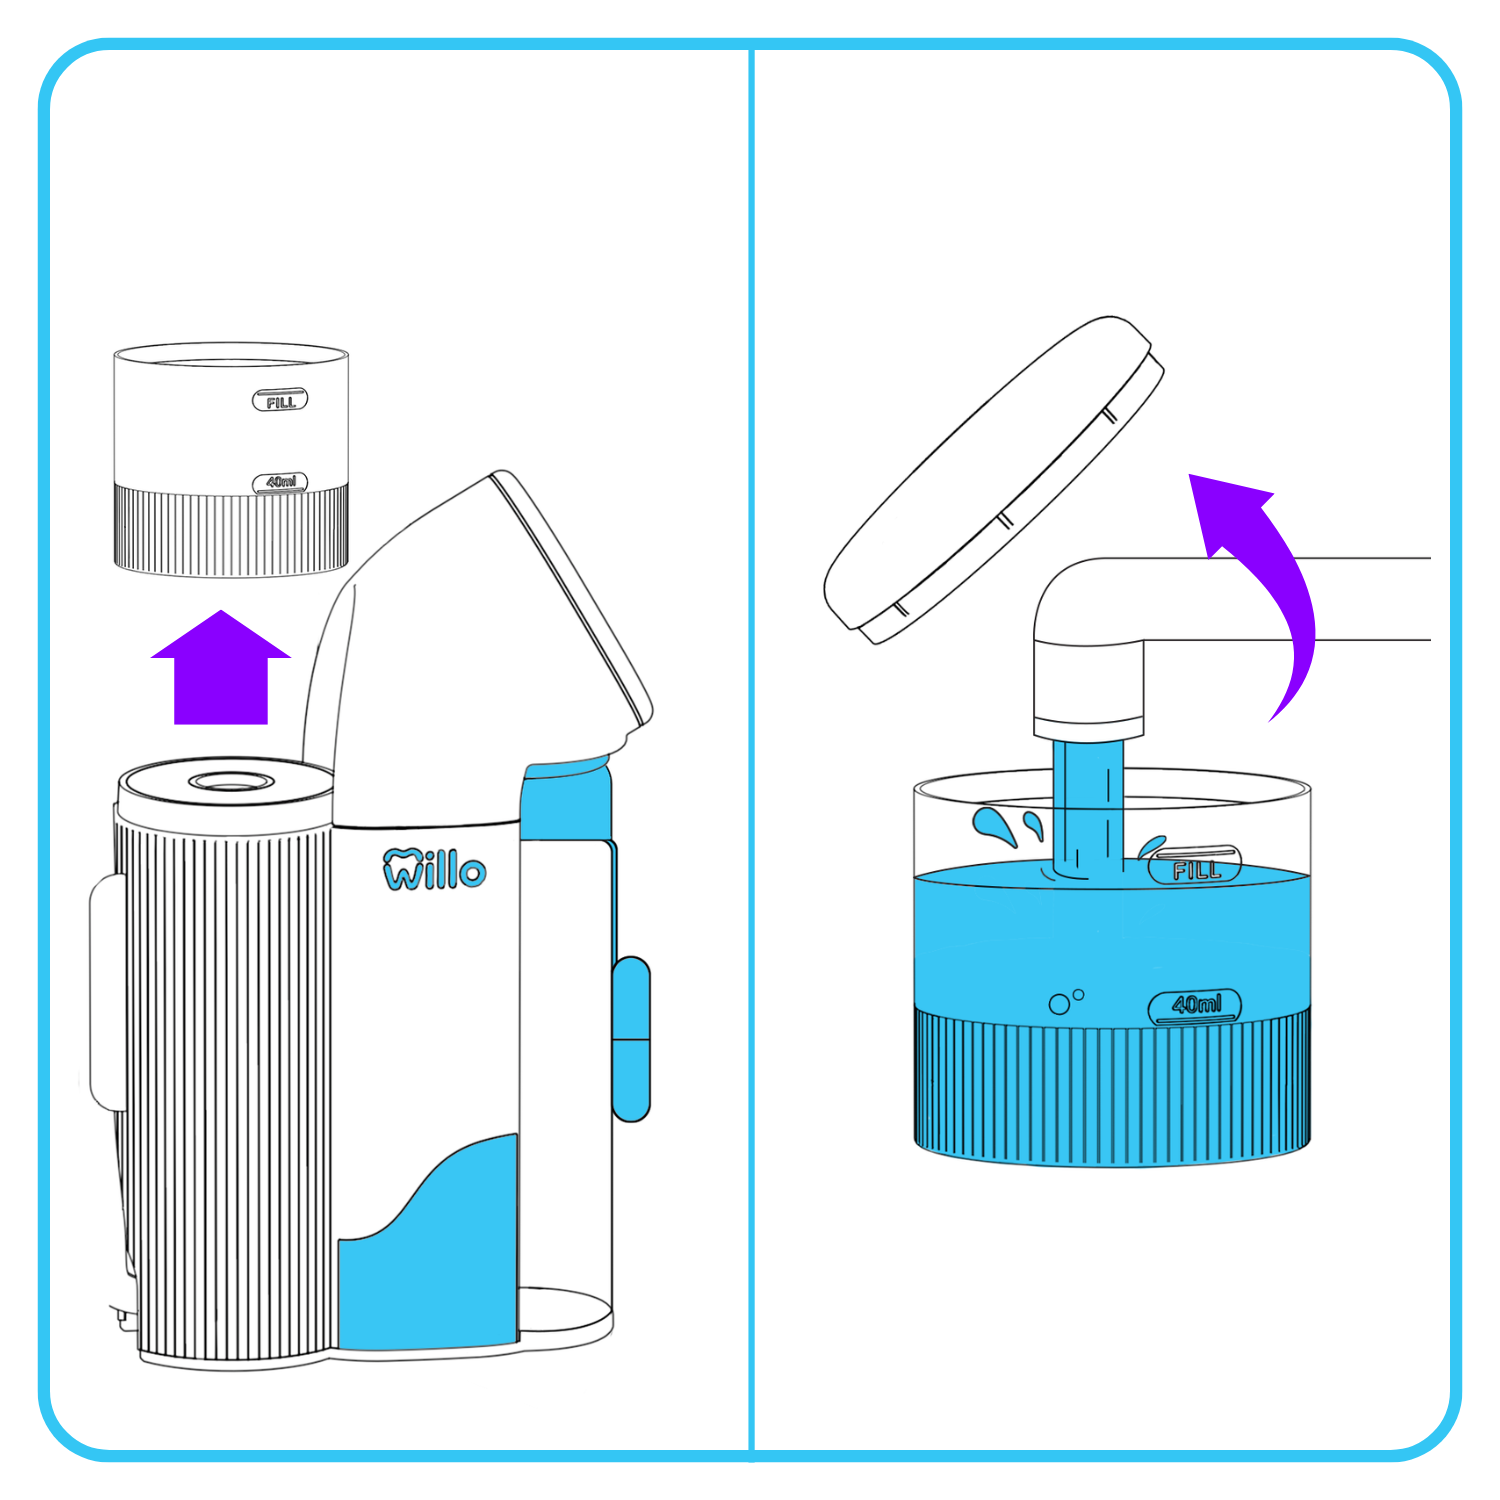
Remove the water tank, lift the lid, then fill it with fresh water to the top fill line. Then close the lid, and return it to the unit.
Step 4
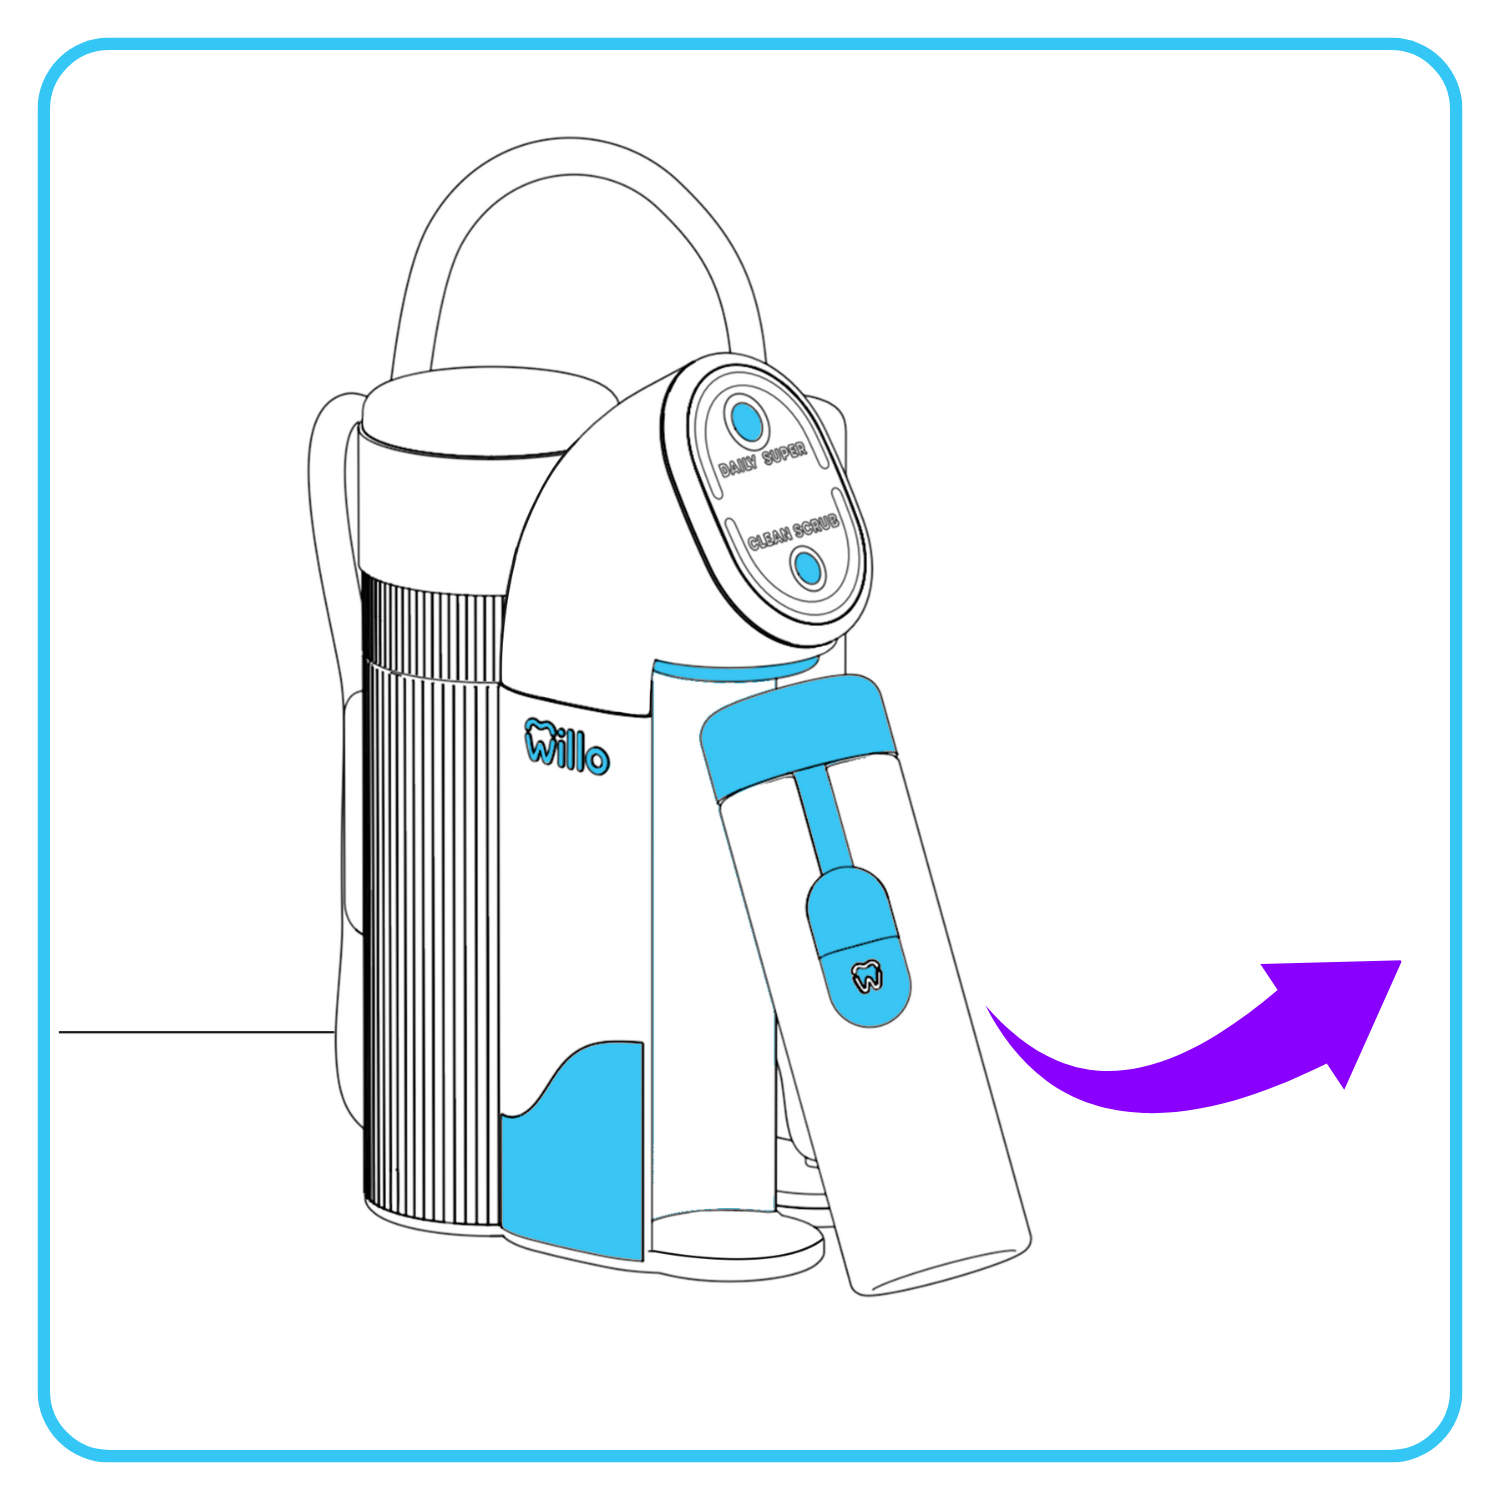
Pull the cleaning bottle from the bottom to remove it.
Store this bottle. You'll use it later to deep clean your Willo.
Step 5
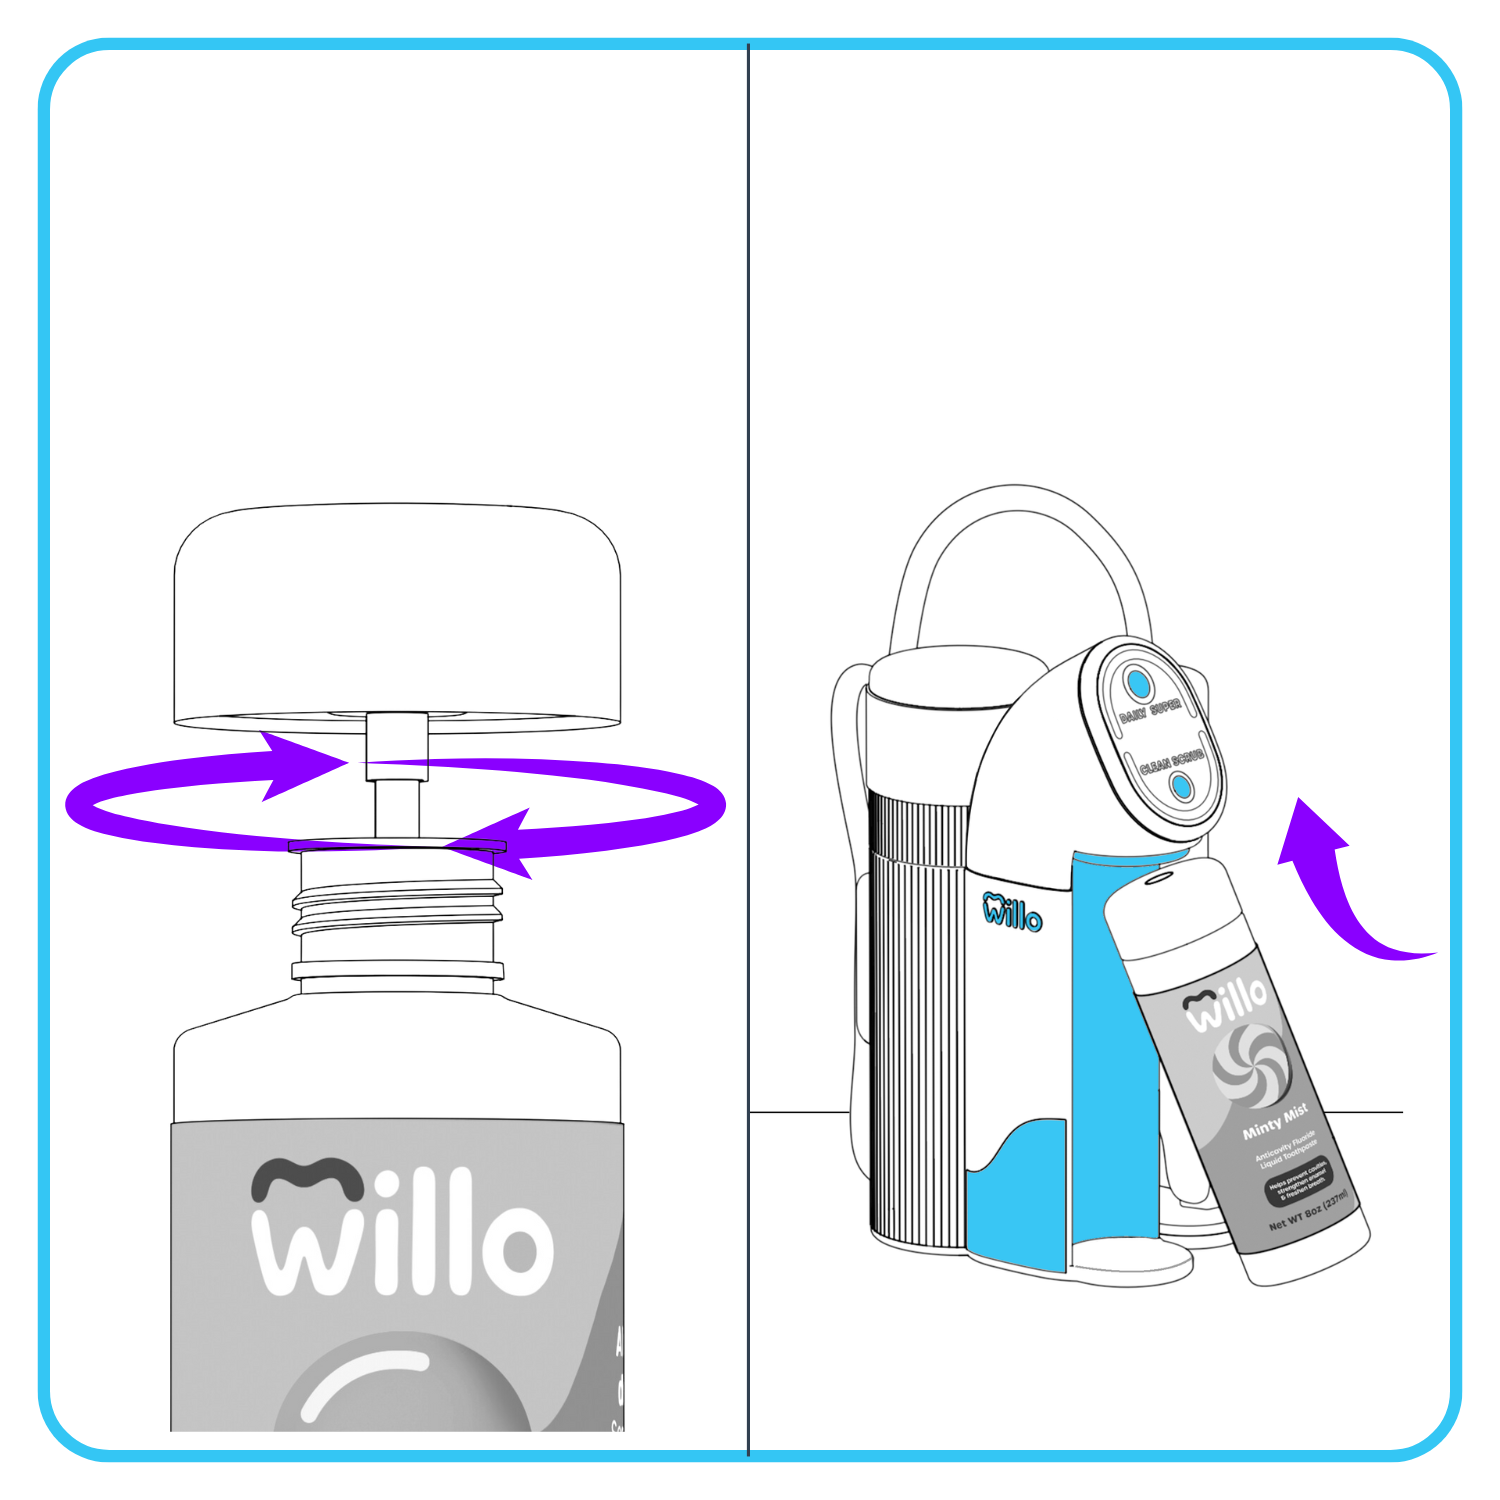
Open and unseal your Willo toothpaste. Insert the custom bottle cap and straw, and twist to tighten. Then insert the top of the liquid toothpaste bottle at an angle, and snap the bottom into place.
Step 6
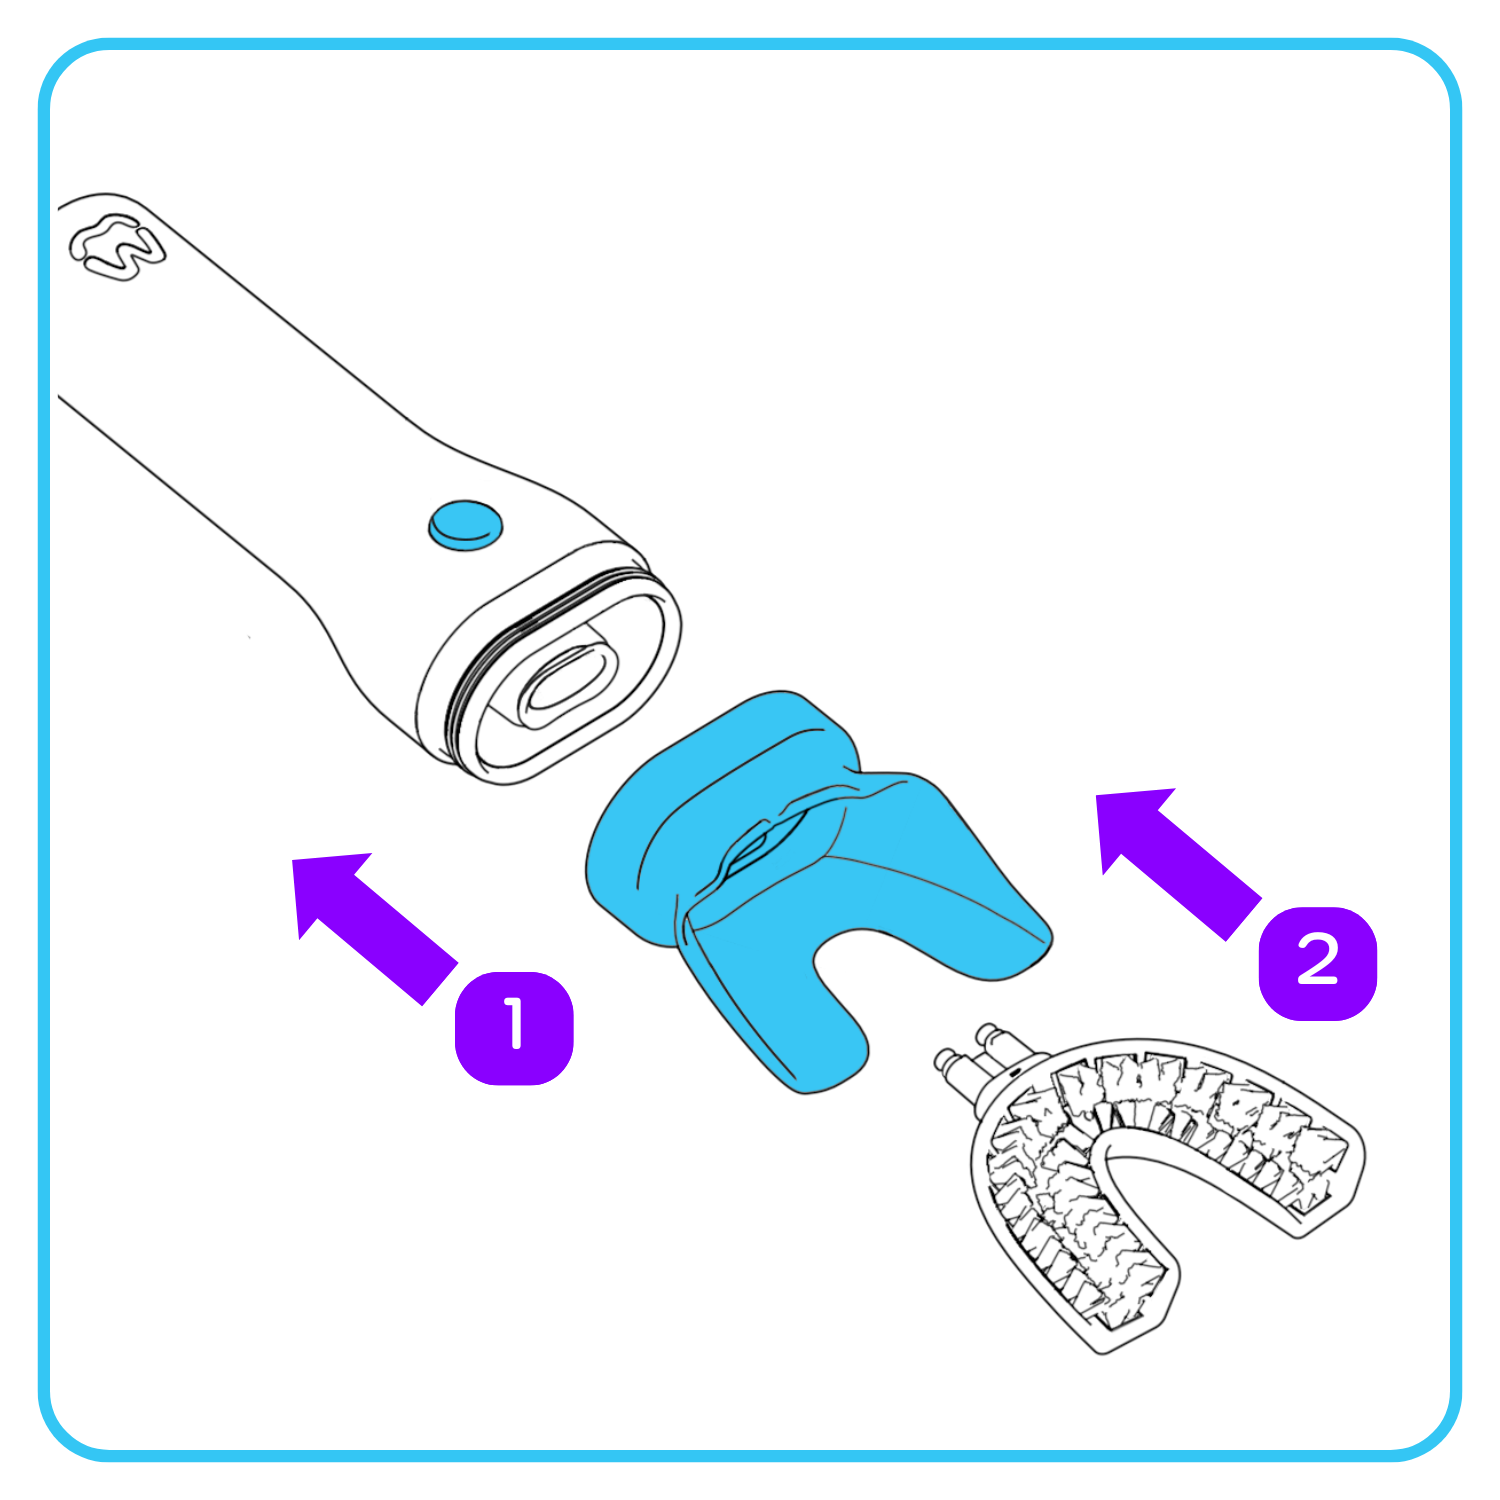
Remove the handle cap. First, firmly attach the blue lip rest. Then, insert the OptiClean brush head onto the handle.
Check around the handle to make sure the lip rest is fully attached with no gaps.
Step 7
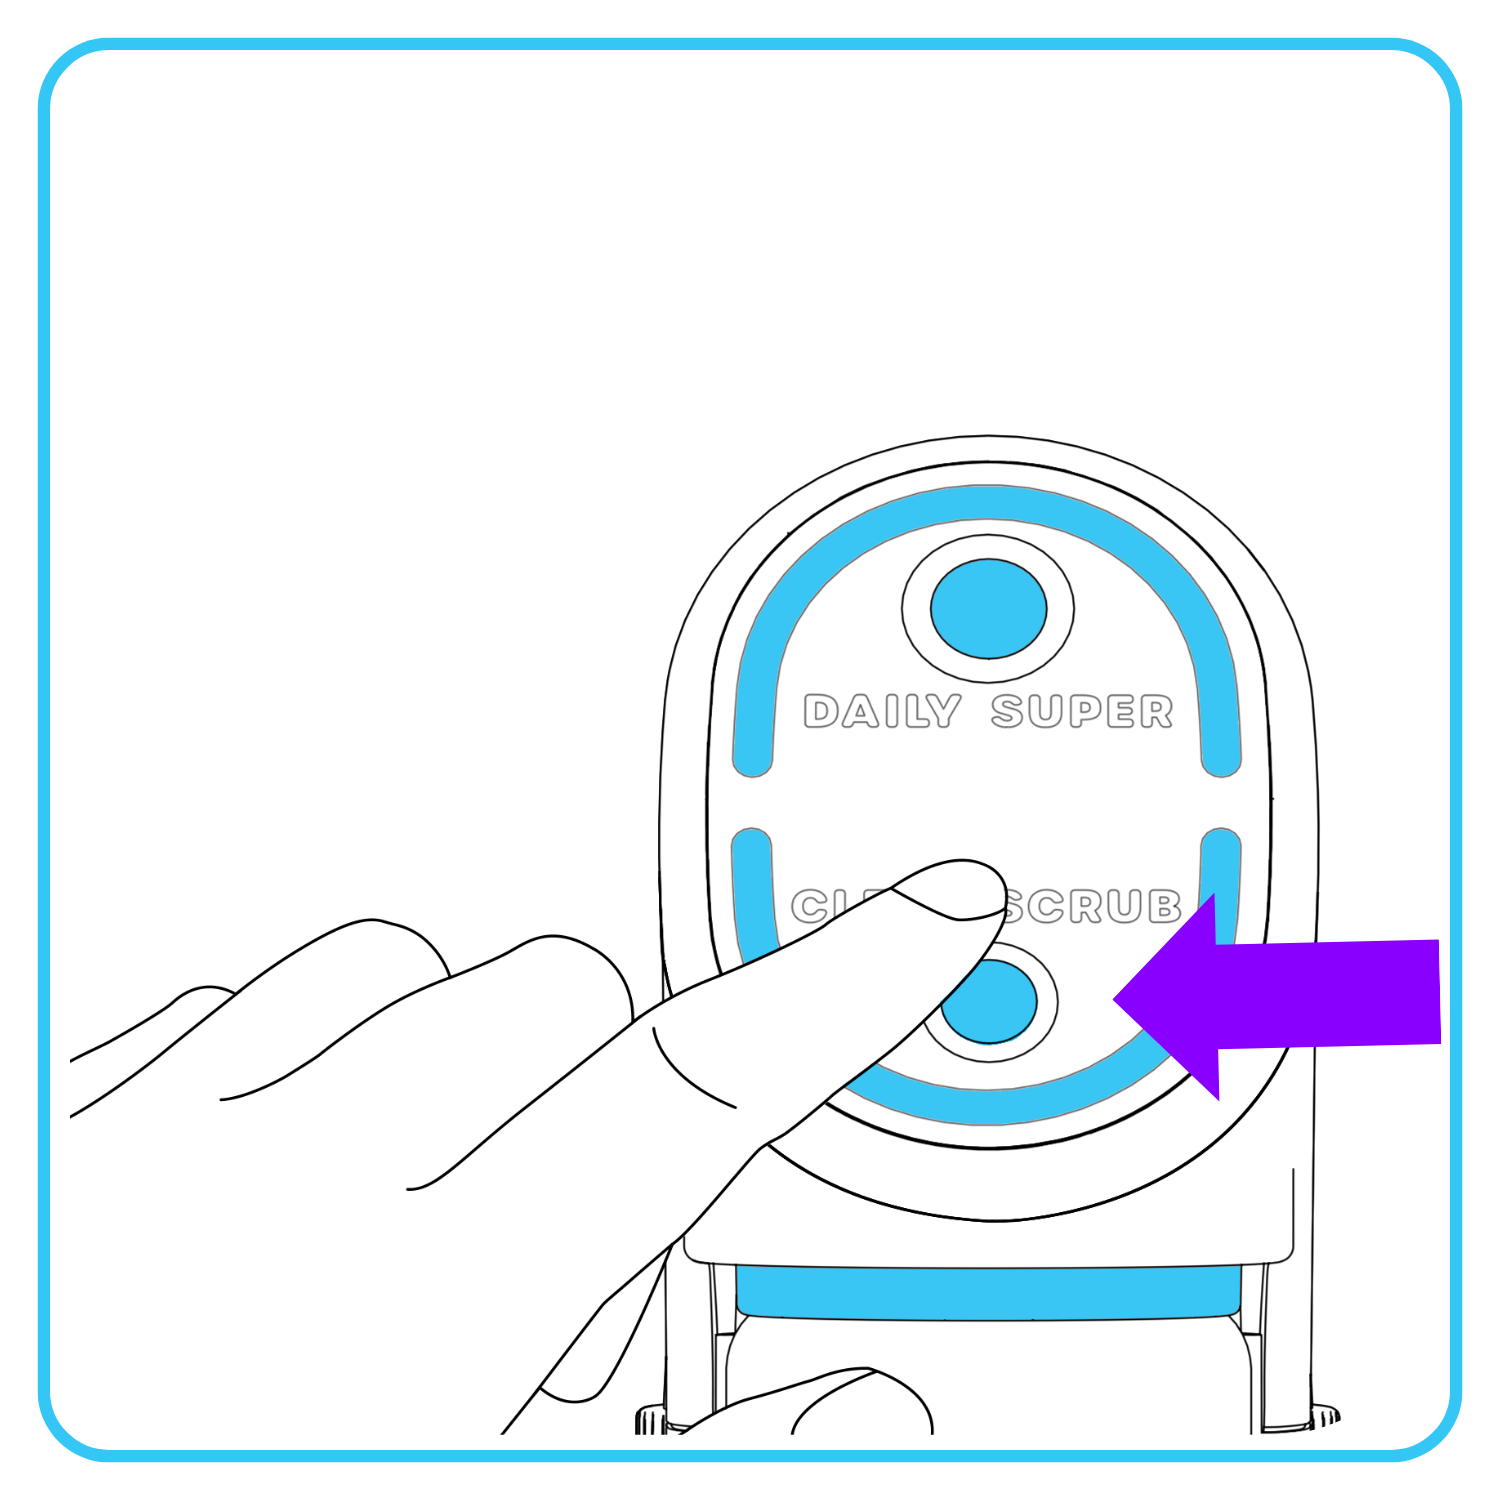
Point the handle into the sink and long press the bottom display button for 3 seconds to prime before your first brushing. The display will turn green while priming. A small amount of liquid may be released.
Priming ensures toothpaste runs smoothly.
Step 1
Place your Willo AutoFlo+ on a flat surface near a sink. Plug it into a power outlet. The display will light up.
Step 2
Place the drain hose in the sink using the suction cup.
Liquid will automatically drain into the sink during brushing.
Step 3
Remove the water tank, lift the lid, then fill it with fresh water to the top fill line. Then close the lid, and return it to the unit.
Step 4
Pull the cleaning bottle from the bottom to remove it.
Store this bottle. You'll use it later to deep clean your Willo.
Step 5
Open and unseal your Willo toothpaste. Insert the custom bottle cap and straw, and twist to tighten. Then insert the top of the liquid toothpaste bottle at an angle, and snap the bottom into place.
Step 6
Remove the handle cap. First, firmly attach the blue lip rest. Then, insert the OptiClean brush head onto the handle.
Check around the handle to make sure the lip rest is fully attached with no gaps.
Step 7
Point the handle into the sink and long press the bottom display button for 3 seconds to prime before your first brushing. The display will turn green while priming. A small amount of liquid may be released.
Priming ensures toothpaste runs smoothly.


